

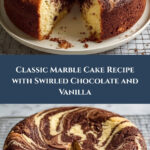
If you’re craving a nostalgic, eye-catching dessert that’s as delightful to taste as it is fun to make, the Classic Marble Cake Recipe is your new best friend in the kitchen. This cake beautifully balances tender vanilla and rich chocolate flavors, intertwined in a stunning marbled pattern that’s pure magic with every slice. Whether you’re baking for a cozy afternoon treat or a festive gathering, this recipe brings a comforting, timeless charm that never fails to impress.

Ingredients You’ll Need
Gathering the right ingredients is key to making a perfect marble cake. Each element in this Classic Marble Cake Recipe plays an essential role in creating its moist texture, balanced sweetness, and distinctive swirls of flavor.
- 2 cups all-purpose flour: Provides structure and the perfect base for the cake’s tender crumb.
- 1 cup white sugar: Adds sweetness that complements both the vanilla and chocolate portions.
- 1 cup milk: Keeps the batter smooth and moist, helping everything come together beautifully.
- 2 large eggs: Acts as a binder while adding richness and fluffiness.
- ½ cup butter, softened: Adds buttery flavor and lends tenderness to the cake.
- 2 teaspoons baking powder: Ensures the cake rises perfectly, giving you a light, airy texture.
- 1 teaspoon vanilla extract: Brings warm, fragrant notes to the vanilla part of the cake.
- ½ teaspoon salt: Balances the sweetness and enhances overall flavor.
- 2 tablespoons unsweetened cocoa powder: Creates the rich chocolate swirls that define this recipe.
How to Make Classic Marble Cake Recipe
Step 1: Prepare Your Pan and Ingredients
Start by preheating your oven to 350 degrees F (175 degrees C) and greasing a 9-inch round pan with butter or cooking spray, then lightly flour it to ensure easy release of your finished cake. Having your ingredients at room temperature makes mixing smoother and results in a better crumb.
Step 2: Mix the Vanilla Batter
In a large bowl, combine the flour, sugar, milk, eggs, softened butter, baking powder, vanilla extract, and salt. Begin mixing slowly to moisten everything, then beat at medium speed with an electric mixer for about 2 minutes until the batter is smooth and creamy.
Step 3: Separate and Cocoa-ize Part of the Batter
Reserve ¾ cup of this vanilla batter and stir in the unsweetened cocoa powder thoroughly, turning it into a luscious chocolate batter. This step is crucial because it gives you that beautiful contrast between the vanilla and chocolate swirls.
Step 4: Create the Marble Effect
Pour the remaining vanilla batter into your prepared pan. Next, drop large spoonfuls of the chocolate batter onto the vanilla layer. Using a knife, gently swirl the chocolate into the vanilla to create the signature marbled pattern—don’t overmix or you’ll lose that pretty contrast!
Step 5: Bake to Perfection
Place the pan in the preheated oven and bake for 30 to 35 minutes. To check doneness, insert a toothpick into the center; it should come out clean or with just a few moist crumbs. This step is when your kitchen will start smelling absolutely irresistible.
Step 6: Cool and Unmold
Allow the cake to cool briefly on a wire rack before carefully inverting it onto a serving plate or cooling rack. Let it cool completely to set the marbled pattern and ensure easier slicing.
How to Serve Classic Marble Cake Recipe

Garnishes
Enhance your marble cake with simple garnishes like a dusting of powdered sugar or a light drizzle of chocolate glaze for extra sweetness and shine. Fresh berries or a sprinkle of chopped nuts can also add pop and texture without overwhelming the delicate flavors.
Side Dishes
This cake shines best with a scoop of vanilla ice cream or a dollop of fresh whipped cream alongside your slice. If you want to keep it classic, pair it with a warm cup of coffee or tea to balance richness and provide comfort in every bite.
Creative Ways to Present
For a festive touch, serve your Classic Marble Cake Recipe sliced and layered with cream cheese frosting or chocolate ganache between layers for a show-stopping presentation. You can also cut the cake into mini squares for an elegant dessert platter, perfect for sharing.
Make Ahead and Storage
Storing Leftovers
Wrap your leftover marble cake tightly in plastic wrap and store at room temperature for up to 3 days. This helps keep the cake moist and prevents it from drying out, so you can enjoy it fresh even days later.
Freezing
If you want to keep your Classic Marble Cake Recipe for longer, freeze it in an airtight container or tightly wrapped foil for up to 2 months. Thaw overnight in the refrigerator to retain its soft texture and rich flavors.
Reheating
To bring the cake back to life, warm slices gently in the microwave for 10 to 15 seconds or briefly in a low-temperature oven. This refreshes the texture and melts any frosting or glaze you may have added.
FAQs
Can I use cocoa powder substitutes for this recipe?
While unsweetened cocoa powder is best for authentic chocolate flavor, you can try natural cocoa or Dutch-processed cocoa, but be aware the taste and color might slightly differ. Adjust the amount to your preference.
Is it possible to make the Classic Marble Cake Recipe gluten-free?
Absolutely! Substitute all-purpose flour with a gluten-free flour blend that measures cup-for-cup. Just be sure your baking powder is gluten-free as well, and expect a slightly different texture, still delicious.
Can I make this cake dairy-free?
Yes, replace the butter with a dairy-free margarine or coconut oil and use plant-based milk like almond or soy milk. The texture will remain moist and the flavor just as satisfying.
How do I achieve better marbling in my cake?
For clear marbling, swirl the batters gently with a knife or skewer without mixing too vigorously. Using spoonfuls of chocolate batter rather than pouring will help keep the pattern distinct.
Can I double or halve this Classic Marble Cake Recipe?
Definitely. Just remember to adjust your baking time accordingly. A larger cake might take longer to bake, so keep testing with a toothpick. For smaller sizes, a shorter bake time is usually sufficient.
Final Thoughts
There is something incredibly comforting about baking and sharing this Classic Marble Cake Recipe. Its perfect harmony of vanilla and chocolate not only pleases the palate but brings a joyful sense of nostalgia. So go ahead, whip up this simple yet stunning cake and watch it become a beloved favorite in your home.
Print
Classic Marble Cake Recipe
- Prep Time: 15 minutes
- Cook Time: 35 minutes
- Total Time: 50 minutes
- Yield: 1 9-inch round cake (about 8–10 servings) 1x
- Category: Dessert
- Method: Baking
- Cuisine: American
- Diet: Vegetarian
Description
This Classic Marble Cake recipe combines rich chocolate and vanilla flavors swirled together in a moist and tender cake. Perfect for any occasion, this easy-to-make cake features a beautiful marbled appearance and a soft, buttery texture, making it a delightful treat for both kids and adults.
Ingredients
Dry Ingredients
- 2 cups all-purpose flour
- 1 cup white sugar
- 2 teaspoons baking powder
- ½ teaspoon salt
- 2 tablespoons unsweetened cocoa powder
Wet Ingredients
- 1 cup milk
- 2 large eggs
- ½ cup butter, softened
- 1 teaspoon vanilla extract
Instructions
- Preheat and Prepare Pan: Preheat your oven to 350 degrees F (175 degrees C). Grease and flour a 9-inch round cake pan to prevent sticking.
- Combine Ingredients: In a large bowl, add the flour, sugar, milk, eggs, softened butter, baking powder, vanilla extract, and salt.
- Mix Batter: Stir the ingredients slowly just until moistened. Then, use an electric mixer at medium speed to beat the mixture for about 2 minutes until it becomes smooth and well combined.
- Reserve Batter: Set aside ¾ cup of this batter for the chocolate portion. Pour the remaining batter into the prepared cake pan.
- Make Chocolate Batter: Stir the unsweetened cocoa powder into the reserved ¾ cup batter until the color is uniform and smooth.
- Create Marble Effect: Spoon large dollops of the chocolate batter on top of the vanilla batter in the pan. Using a knife, swirl the chocolate batter through the vanilla batter gently to create a marbled look.
- Bake the Cake: Place the cake pan in the preheated oven and bake for approximately 30 to 35 minutes. The cake is done when a toothpick inserted into the center comes out clean.
- Cool and Serve: Remove the cake and cool it briefly on a wire rack. Then carefully invert the cake onto a serving plate or cooling rack. Allow it to cool completely before slicing and serving.
Notes
- Ensure all wet ingredients are at room temperature for better mixing and texture.
- Do not overmix the batter after adding flour to avoid a tough cake.
- Test doneness by inserting a toothpick in the center; it should come out clean or with a few crumbs.
- For added flavor, you can sprinkle powdered sugar on top once cooled.
- This cake is best enjoyed fresh but can be stored in an airtight container for up to 3 days.
Your email address will not be published. Required fields are marked *