

Picture this: the sweet, buttery aroma of caramelized bananas filling your kitchen, mingling with the warm, fragrant hint of cinnamon. As you scoop into this luscious, creamy dessert, the velvety texture melts on your tongue, punctuated by delightful crunches of toasted nuts—a perfect harmony of flavors and textures. This Caramelized Banana Ice Cream with Nuts using Ninja Creami Recipe is not just an ice cream; it’s a celebration of comfort and sophistication, all whipped up effortlessly at home. Whether you’re in need of a quick treat or impressing friends with homemade delights, this recipe is your new best friend.
Why You’ll Love This Caramelized Banana Ice Cream with Nuts using Ninja Creami Recipe
- Ready in 30 minutes: The entire process, aside from freezing, moves quickly, giving you divine ice cream without the wait of a traditional method.
- Uses simple ingredients: No fuss here—just ripe bananas, cream, butter, cinnamon, and a few pantry staples bring magic to your freezer.
- Perfect for beginners: The Ninja Creami does much of the heavy lifting, making it easy and fun to create gourmet ice cream at home.
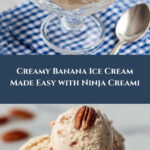
- Impressive presentation: Caramelized bananas and crunchy nuts make this ice cream look as irresistible as it tastes.
- Customizable: Love your nuts toasted? Want a swirl of chocolate? This recipe is your base to play and personalize endlessly.
Why This Caramelized Banana Ice Cream with Nuts using Ninja Creami Recipe Works
This recipe shines because of three key elements: caramelizing the bananas enhances their natural sweetness and gives a rich depth of flavor that regular bananas simply don’t have; the infusion of cinnamon and vanilla adds layers of warmth and complexity; and the Ninja Creami machine’s ability to spin and churn turns your creamy base into a perfectly smooth, scoopable ice cream without ice crystals. Finally, the nuts add a satisfying crunch, giving texture and a nutty contrast—making every bite exciting.

Ingredients You’ll Need
These straightforward ingredients come together beautifully to create a luxurious yet approachable dessert. Each one plays a vital role in building flavor and texture.
- Unsalted butter: For caramelizing bananas and creating a rich base.
- Ripe bananas: The star ingredient, they provide natural sweetness and creaminess.
- Brown sugar: Adds caramel notes and balances the banana’s flavor.
- Ground cinnamon: Adds warm spice and depth.
- Vanilla extract: A classic flavor enhancer for sweetness and complexity.
- Whole milk: Lightens the base and ensures smoothness.
- Heavy cream: Gives the ice cream its creamy, indulgent texture.
- Chopped nuts (optional): Adds crunch and nutty goodness, perfect for mix-ins.
Ingredient Substitutions & Tips
- Unsalted butter: You can use coconut oil for a dairy-free option, which adds a subtle tropical note.
- Ripe bananas: Overripe bananas work best for sweetness, but you can also use plantains for a twist.
- Brown sugar: Substitute with maple syrup or honey for a natural sweetener alternative.
- Heavy cream: Use full-fat coconut milk for a vegan-friendly version that still feels creamy.
👨🍳 Pro Tips for Perfect Results
- Use very ripe bananas: The riper, the sweeter—this cuts down on added sugar and amps up flavor.
- Caramelize carefully: Keep the heat moderate to avoid burning and develop a rich golden glaze on your bananas.
- Freeze the base well: Make sure your pint container is frozen flat and solid to ensure smooth spinning in the Ninja Creami.
- Add nuts last: Incorporate them at the final step using the mix-in function to maintain their crunch.
- Re-spin for creaminess: If your ice cream looks grainy or crumbly after the first spin, don’t hesitate to re-spin—it’s magic!
How to Make Caramelized Banana Ice Cream with Nuts using Ninja Creami Recipe
Step 1: Caramelize the Bananas
Start by melting the unsalted butter over medium heat in a small saucepan. Add sliced bananas, sprinkle with brown sugar and half the cinnamon, then cook for about 2–3 minutes per side. Watch closely; you want the bananas softened and caramelized with a golden crust, not burnt. This step unlocks deep, sweet flavors that elevate your ice cream.
💡 Pro Tip: Use a shallow pan for even caramelization and resist stirring too much to let the bananas develop that perfect glaze.
Step 2: Blend the Base
Transfer the caramelized bananas and their syrup to a bowl. Stir in the remaining cinnamon, vanilla extract, and whole milk. Use an immersion blender to puree until perfectly smooth. Then, whisk in the heavy cream for that luscious texture. Taste carefully and add more brown sugar if you prefer it sweeter.
💡 Pro Tip: Blend just enough to combine, keeping the base airy for a lighter ice cream texture.
Step 3: Freeze the Mixture
Pour the creamy banana base into the Ninja Creami pint container, keeping below the max fill line. Seal it up tightly and place it flat in your freezer for at least 24 hours. Slow, thorough freezing is crucial for a creamy end product.
💡 Pro Tip: Ensure the container sits on a flat surface inside your freezer to prevent uneven freezing or ice crystals.
Step 4: Spin in the Ninja Creami
Remove the pint from the freezer and insert it into the outer bowl of your Ninja Creami. Lock it securely and select the “Ice Cream” function to churn. If your ice cream turns out crumbly or icy, use the “Re-spin” function once or twice until you hit that perfect creamy texture.
💡 Pro Tip: Don’t rush the re-spin process—it transforms the texture from icy to velvety effortlessly.
Step 5: Add Nuts (Optional Mix-Ins)
Create a small well in your freshly spun ice cream, add the chopped nuts or other mix-ins like chocolate chips, then use the Mix-in function. This keeps the nuts crunchy and evenly distributed.
💡 Pro Tip: Toast nuts lightly before mixing in to intensify their flavor and crunch.
Common Mistakes to Avoid
Learn from these common pitfalls:
- Skipping caramelization: Missing this step results in bland banana flavor and less depth.
- Using underripe bananas: They lack sweetness and won’t caramelize well.
- Filling above max line: Overfilling the pint causes freezing issues and uneven texture.
- Not freezing long enough: Ice cream won’t spin properly without a full 24 hours of freezing.
- Mixing nuts too early: Adds sogginess or breaks them down, ruining crunch.
- Over-churning: Can lead to icy or too dense texture if re-spin is overused.
Delicious Variations to Try
Once you’ve mastered this Caramelized Banana Ice Cream with Nuts using Ninja Creami Recipe, you can swap and twist flavors to keep things exciting:
Chocolate Swirl
Add a ribbon of melted dark chocolate or chocolate sauce during the mix-in step for a sophisticated mocha vibe.
Spiced Rum Infusion
Add a tablespoon of spiced rum to the base mixture before freezing for adult-friendly tropical warmth.
Peanut Butter Ripple
Swirl in creamy peanut butter with nuts during mix-in for a rich, nutty delight that pairs beautifully with bananas.
Tropical Twist
Mix in shredded toasted coconut and diced pineapple chunks for an island-inspired scoop that transports you straight to the beach.
Maple Walnut Crunch
Replace brown sugar with maple syrup in the base and swap nuts for toasted walnuts to add a cozy, autumnal feel.
How to Serve Caramelized Banana Ice Cream with Nuts using Ninja Creami Recipe

Garnishes
A light dusting of cinnamon, a drizzle of caramel sauce, or extra chopped nuts create an inviting finishing touch that elevates every bite visually and texturally.
Side Dishes
Serve alongside warm banana bread, spiced pecan pie, or a slice of rich chocolate cake for delightful contrasting temperatures and flavors.
Creative Ways to Present
Scoop the ice cream into elegant martini glasses topped with toasted nuts and a thin banana chip or cinnamon stick for a stunning dessert presentation perfect for entertaining.
Make Ahead and Storage
Storing Leftovers
Keep leftovers in the original Ninja Creami container, sealed tightly, in the freezer. Use a flat airtight lid or plastic wrap to prevent freezer burn and preserve texture and flavor.
Freezing
Ensure the ice cream base is fully frozen for at least 24 hours before processing. After spinning, return leftovers to the freezer and allow them to firm up for a few hours before scooping again.
Reheating
Ice cream doesn’t require reheating, but letting it sit at room temperature for 5–10 minutes helps scoopability if it’s very firm.
FAQs
Can I use frozen bananas instead of fresh?
Absolutely! Frozen bananas work great for this recipe and can add extra creaminess, but be sure to thaw and drain any excess liquid before caramelizing.
What if I don’t have a Ninja Creami machine?
You can still make this ice cream by freezing the base in a shallow container and stirring every 30 minutes until creamy, though the texture won’t be quite as smooth.
Can I make this dairy-free?
Yes! Substitute heavy cream with full-fat coconut milk and butter with coconut oil to keep it creamy and dairy-free.
How long does the ice cream keep in the freezer?
Stored properly, it should stay fresh and delicious for up to 2 weeks without significant icy texture changes.
Can I omit nuts if I have allergies?
Definitely—nuts are optional here, and the ice cream is just as delightful without them.
Can I add other mix-ins?
For sure! Chocolate chips, cookie crumbs, or fruit pieces all make fantastic additions during the mix-in step.
Why does my ice cream sometimes come out icy?
Insufficient freezing before spinning or skipping the re-spin step often causes iciness—both are key to silky texture.
Is it necessary to caramelize the bananas?
While you can skip it, caramelization deepens the banana’s sweetness and flavor, making the ice cream extra special and irresistible.
Final Thoughts
This Caramelized Banana Ice Cream with Nuts using Ninja Creami Recipe is pure magic in your kitchen. The luscious caramelized bananas paired with crunchy nuts create a symphony of flavor and texture that feels luxurious but is completely achievable for home cooks of all levels. I hope this recipe brings you as much joy making it as you will eating it.
Have you tried this Caramelized Banana Ice Cream with Nuts using Ninja Creami Recipe? I’d love to hear how it turned out! Leave a comment below. If you loved this recipe, please share it with friends and family. Happy cooking! 😊
Print
Caramelized Banana Ice Cream with Nuts using Ninja Creami Recipe
- Prep Time: 10 minutes
- Cook Time: 6 minutes
- Total Time: 24 hours 16 minutes
- Yield: 2 servings 1x
- Category: Dessert
- Method: Blending
- Cuisine: American
- Diet: Vegetarian
Description
This Ninja Creami Banana Ice Cream recipe transforms ripe bananas into a creamy, rich dessert with a caramelized twist. Enhanced with brown sugar, cinnamon, and a touch of vanilla, it uses whole milk and heavy cream to achieve a velvety texture. The mixture freezes before being processed in the Ninja Creami for a smooth and decadent homemade ice cream experience, perfect for banana lovers seeking a quick yet indulgent treat.
Ingredients
Caramelized Banana Mixture
- 1 tablespoon unsalted butter
- 1 large or 2 small ripe bananas, sliced
- 2–3 tablespoons brown sugar (to taste)
- 1/2 teaspoon ground cinnamon, divided
Ice Cream Base
- 1 teaspoon vanilla extract
- 3/4 cup whole milk
- 3/4 cup heavy cream
Optional Mix-ins
- 3 tablespoons chopped nuts (optional)
Instructions
- Caramelize the Bananas: In a small saucepan over medium heat, melt the butter. Add the sliced bananas and sprinkle with 2 tablespoons of brown sugar and 1/4 teaspoon of ground cinnamon. Cook the bananas for 2 to 3 minutes on each side until they soften and caramelize, turning golden brown. Remove from heat and allow the mixture to cool slightly.
- Blend the Base: Transfer the caramelized bananas along with their syrup into a large measuring cup or bowl. Add the remaining 1/4 teaspoon of cinnamon, vanilla extract, and whole milk. Use an immersion blender to puree the mixture until completely smooth. Then stir in the heavy cream with a whisk. Taste the mixture and add an additional tablespoon of brown sugar if you prefer a sweeter ice cream base.
- Freeze the Mixture: Pour the blended banana ice cream mixture into a Ninja Creami pint container, making sure not to exceed the max fill line. Secure the lid firmly and place the container on a level surface in your freezer. Freeze for at least 24 hours to ensure the mixture is solid and ready for processing.
- Process in the Ninja Creami: Once frozen, remove the pint from the freezer and place it into the outer bowl of the Ninja Creami machine. Lock it securely in place. Select the “Ice Cream” function on the machine. If the ice cream is crumbly or grainy after the initial spin, use the “Re-spin” function once or twice to achieve a creamy, smooth texture.
- Add Mix-ins (Optional): If you want to add texture and flavor, create a small well in the center of the processed ice cream and add your 3 tablespoons of chopped nuts or any other mix-ins you prefer. Use the Ninja Creami’s “Mix-in” function to evenly incorporate these additions into the ice cream with a gentle fold.
Notes
- Be sure to use ripe bananas for natural sweetness and best flavor.
- Adjust the amount of brown sugar according to personal taste and how sweet your bananas are.
- The cinnamon can be omitted or substituted with other spices like nutmeg or cardamom.
- Ensure the ice cream mixture is frozen solid for 24 hours before processing to get the best texture.
- For a dairy-free version, substitute whole milk and heavy cream with coconut milk or other plant-based creams, but note texture differences.
- If you don’t have a Ninja Creami, you can try freezing the mixture and blending it manually, but the texture might vary.
Your email address will not be published. Required fields are marked *