

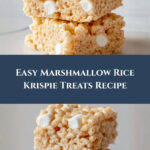
If you’ve ever wanted a nostalgic treat that’s easy to make, irresistibly chewy, and perfectly sweet, then this Marshmallow Rice Krispie Treats Recipe is exactly what you need. Combining the comforting crunch of Rice Krispies with the melty, gooey delight of marshmallows and a hint of vanilla, these treats are an all-time favorite for any occasion. Whether it’s a quick snack, a party hit, or a fun project to make with the kids, this recipe always delivers that classic, cozy flavor wrapped in a soft, crispy texture.

Ingredients You’ll Need
This Marshmallow Rice Krispie Treats Recipe relies on just a handful of simple ingredients that work together to create the perfect balance of flavor and texture. Each ingredient plays a key role—from the rich, salted butter that adds depth, to the mini marshmallows that bring chewiness and sweetness, and the Rice Krispie cereal that gives the signature crispy crunch.
- 1/3 cup salted butter: The butter adds richness and helps melt the marshmallows evenly for a smooth mixture.
- 2 10.5 oz bags mini marshmallows, divided: Marshmallows are the star of the show, providing gooey sweetness and binding everything together.
- 1 teaspoon vanilla extract: Vanilla enhances the flavor with a warm, aromatic touch that elevates the treats.
- 8 cups Rice Krispie cereal: The crispy rice cereal adds the delightful crunch and classic texture you expect.
How to Make Marshmallow Rice Krispie Treats Recipe
Step 1: Prepare Your Pan
Start by spraying a 9×13-inch pan with non-stick spray. This simple prep ensures your Marshmallow Rice Krispie Treats slide out cleanly and keep their perfect shape without sticking, which makes serving a breeze.
Step 2: Measure and Melt
Pour the Rice Krispie cereal into a large bowl, setting it aside before you move on to melting. Next, melt the butter in the microwave until fully liquid—this step is crucial because the butter evenly coats the marshmallows and cereal, making every bite smoothly flavorful.
Step 3: Combine Butter and Marshmallows
Add most of the mini marshmallows to the melted butter and stir gently. Pop the mixture back into the microwave and heat it for one minute, stirring halfway through. This melts the marshmallows perfectly, creating the luscious, sticky base for your treats.
Step 4: Add Vanilla and Mix
Stir in the vanilla extract until the mixture is velvety smooth. Then, pour this marshmallow blend over the bowl of Rice Krispies. Mixing it all together thoroughly ensures every crunch is coated with sweet gooeyness.
Step 5: Fold in Remaining Marshmallows and Press
Fold in the remaining mini marshmallows for delightful bursts of texture throughout the treats. Finally, with damp hands (this helps prevent sticking), gently press the mixture firmly but evenly into the prepared pan. This step locks in the shape and texture so your treats hold together just right.
How to Serve Marshmallow Rice Krispie Treats Recipe

Garnishes
Once your Marshmallow Rice Krispie Treats are set, consider sprinkling them with colorful rainbow sprinkles, a drizzle of melted chocolate, or even some chopped nuts for a fun pop of flavor and visual appeal. These simple touches make the treats feel extra special and party-ready.
Side Dishes
These treats pair wonderfully with fresh fruit or a glass of cold milk for a classic combo. If you want to turn it into a full dessert spread, serve alongside brownies or chocolate-dipped strawberries to delight everyone’s sweet tooth.
Creative Ways to Present
For a playful twist on this Marshmallow Rice Krispie Treats Recipe, try shaping the mixture into themed molds—like hearts for Valentine’s Day or stars for a festive occasion. Alternatively, slice into bite-sized squares and stack them on a colorful platter or skewer them for a fun treat pop.
Make Ahead and Storage
Storing Leftovers
These treats keep best when stored in an airtight container at room temperature, where they stay soft and chewy for up to 3 days. Avoid refrigeration as it can dry them out and lose that perfect texture.
Freezing
If you want to save them longer, wrap leftovers tightly in plastic wrap and store in a freezer-safe bag. They freeze well for up to 6 weeks; just thaw at room temperature before enjoying.
Reheating
While these treats are typically enjoyed as-is, if you prefer them warmed, pop a piece in the microwave for 5-7 seconds to soften the marshmallow again and bring back the gooey goodness without melting them completely.
FAQs
Can I use regular marshmallows instead of mini marshmallows?
Absolutely! Regular marshmallows will work just fine—you might just need to chop them a bit smaller to ensure they melt quickly and mix well with the cereal.
Is it necessary to use salted butter?
Salted butter adds a subtle balance by enhancing sweetness, but you can use unsalted butter and simply add a pinch of salt if that’s what you have on hand.
How can I make these treats gluten-free?
Check that you use gluten-free Rice Krispie cereal, as some brands may contain malt flavoring derived from barley. Using certified gluten-free cereal makes the treat safe for gluten-sensitive diets.
Can I add mix-ins like chocolate chips or nuts?
Definitely! Mixing in chocolate chips, chopped nuts, or even dried fruit adds layers of flavor and texture. Just fold them in with the cereal before pressing into the pan.
What’s the best way to cut the treats without making a mess?
Use a sharp knife and lightly wet or grease the blade between cuts to prevent the sticky marshmallow from clinging and tearing the treats.
Final Thoughts
I genuinely believe this Marshmallow Rice Krispie Treats Recipe is one of those timeless classics that never fails to bring a smile. It’s quick, straightforward, and perfect for any level of kitchen expertise. Whether you’re an experienced baker or just looking for a sweet pick-me-up, give this recipe a try—you’ll be making these chewy, crispy delights again and again in no time!
Print
Marshmallow Rice Krispie Treats Recipe
- Prep Time: 5 minutes
- Cook Time: 10 minutes
- Total Time: 15 minutes
- Yield: 24 servings 1x
- Category: Dessert
- Method: No-Cook
- Cuisine: American
Description
These classic Marshmallow Rice Krispie Treats are a quick and easy no-bake dessert, perfect for satisfying your sweet tooth with a delightful combination of crispy cereal and gooey marshmallows. Ready in just 15 minutes, they’re great for parties, snacks, or a fun treat anytime.
Ingredients
Ingredients
- 1/3 cup salted butter
- 2 (10.5 oz) bags mini marshmallows, divided
- 1 teaspoon vanilla extract
- 8 cups Rice Krispie cereal
Instructions
- Prepare the Pan: Spray a 9×13-inch pan with non-stick cooking spray to ensure the treats don’t stick and are easy to remove once set.
- Measure Cereal: Pour 8 cups of Rice Krispie cereal into a large mixing bowl and set aside for later use.
- Melt Butter: In the microwave, melt 1/3 cup salted butter until fully liquid, being careful not to burn it.
- Add Marshmallows: Mix most of the mini marshmallows into the melted butter.
- Microwave Mixture: Microwave this butter and marshmallow mixture for about one minute, stirring halfway through to ensure the marshmallows melt evenly.
- Stir in Vanilla: Add 1 teaspoon of vanilla extract to the melted marshmallow mixture and stir until smooth and well combined.
- Combine with Cereal: Pour the melted marshmallow mixture over the Rice Krispie cereal in the large bowl and gently mix until the cereal is fully coated.
- Fold In Remaining Marshmallows: Gently fold in the remaining mini marshmallows to add extra gooey pockets throughout the treats.
- Press Into Pan: Using wet hands to prevent sticking, press the mixture gently but firmly into the prepared 9×13 pan to form an even layer.
Notes
- Using wet hands when pressing the treats prevents sticking and helps achieve a flat, even surface.
- For variation, consider adding chocolate chips, sprinkles, or nuts to the mixture before pressing into the pan.
- Store the treats in an airtight container at room temperature for up to 3 days for best freshness.
- To make cutting easier, let the treats cool completely in the pan before slicing.
Your email address will not be published. Required fields are marked *