
 with 3 Simple Ingredients Recipe 4")
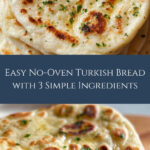
If you’ve ever wished you could enjoy freshly baked Turkish bread but don’t have access to an oven, you’re in for a real treat. The No-Oven Turkish Bread (Bazlama) with 3 Simple Ingredients Recipe is a wonderfully easy and satisfying way to make soft, fluffy, and slightly chewy flatbreads right on your stovetop. This bread is a beloved staple in Turkish cuisine, and with just a handful of pantry essentials, you’ll have warm, comforting bread in no time that pairs perfectly with any meal or stands gloriously on its own.
 with 3 Simple Ingredients Recipe 5")
Ingredients You’ll Need
Keeping the ingredients simple is one of the best parts about this recipe. Each component plays a vital role in creating the perfect texture and flavor that will have you hooked from the very first bite.
- Bread flour or all-purpose flour: Provides the right amount of gluten to give the bread its signature softness and chewiness.
- Warm milk: Adds richness and tenderness to the dough while creating a lovely golden color on the crust.
- Warm water: Combines with the milk to activate the yeast and keep the dough light and airy.
- Instant dry yeast: The magical ingredient that helps the dough rise and develop flavor quickly.
- Sugar: Feeds the yeast and adds just a touch of sweetness to balance the bread’s flavor.
- Salt: Enhances all the other flavors and strengthens the dough structure.
- Melted unsalted butter or olive oil: Brushed on the bread to add moistness and a delicate richness after cooking.
- Chopped parsley (optional): For a fresh, herbal garnish that adds a pop of color and flavor when serving.
How to Make No-Oven Turkish Bread (Bazlama) with 3 Simple Ingredients Recipe
Step 1: Activate the Yeast
Begin by combining the warm milk, warm water, sugar, and instant dry yeast in a mixing container. Stir gently to dissolve everything. This step wakes up the yeast, ensuring your bread rises perfectly fluffy and light. Let this mixture rest until you see bubbles or foam forming—about 5 to 10 minutes.
Step 2: Mix and Knead the Dough
Once your yeast mixture is lively, add the flour and salt. Mix everything until a shaggy dough forms, then get those hands working! Knead the dough on a lightly floured surface until it’s smooth and no longer sticky—this usually takes about 10 minutes. This is when the gluten develops, giving Bazlama its satisfying texture.
Step 3: Let the Dough Rise
Place the dough in a clean bowl and cover it. Let it proof in a warm spot until it doubles in size—usually about one hour. You’ll notice it becomes soft, airy, and just begging to be cooked.
Step 4: Shape the Dough
After rising, divide the dough into six equal pieces. Shape them into rounds, then cover with plastic wrap or a clean towel to relax the dough. When ready, press each piece with a rolling pin into an 18 cm (around 7 inches) diameter circle, about 5 mm thick. This creates the perfect thickness for cooking in a pan.
Step 5: Cook on the Stovetop
Heat a thick-bottomed pan over medium heat—cast iron works beautifully here. Place a dough round into the pan and cook until you see lots of bubbles form on the surface, then flip to the other side. When the bread starts to puff up and sounds like it’s popping, turn the heat down to low to finish cooking gently. Cover with a cloth to keep the bread soft and moist.
Step 6: Finish with Butter or Olive Oil
Once cooked, brush the warm bread with melted butter or olive oil for an indulgent touch and a beautiful shine. Your homemade Bazlama is now ready to enjoy!
How to Serve No-Oven Turkish Bread (Bazlama) with 3 Simple Ingredients Recipe
 with 3 Simple Ingredients Recipe 6")
Garnishes
Sprinkle fresh chopped parsley over the warm bread to add a vibrant color contrast and an herbal, fresh note. Alternatively, a light dusting of za’atar or sumac can add an exciting Middle Eastern flavor twist.
Side Dishes
Bazlama is incredibly versatile—serve it alongside creamy hummus, tangy yogurt dips, or smoky grilled meats. It also pairs beautifully with fresh salads or can double as a wrap for falafel or kebabs, making it a perfect partner for a variety of dishes.
Creative Ways to Present
Turn this simple bread into an appetizer by cutting it into small wedges and serving with olive oil and za’atar for dipping. Or stack multiple layers with cheese and greens to create mouthwatering sandwiches. Another fun idea is to top Bazlama with warm cooked vegetables and a dollop of garlicky yogurt for a quick meal.
Make Ahead and Storage
Storing Leftovers
You can keep any leftover No-Oven Turkish Bread (Bazlama) with 3 Simple Ingredients Recipe fresh for up to two days by placing it in an airtight container or wrapping it tightly in foil at room temperature.
Freezing
For longer storage, freeze the bread in a sealed freezer-safe bag. When you’re ready to enjoy it, just thaw at room temperature. Freezing also maintains the bread’s softness and flavor for up to one month.
Reheating
Reheat Bazlama gently in a warm pan or wrapped in foil in a low oven if you want it soft, or toast it briefly in a dry skillet to restore a bit of crispness on the outside while keeping the inside tender.
FAQs
Can I substitute all-purpose flour for bread flour in this recipe?
Absolutely! While bread flour gives a chewier texture due to its higher gluten content, all-purpose flour works just fine and results in a slightly softer bread. Either way, your Bazlama will be delicious.
Do I really need to use warm milk and water?
Yes, using warm liquids helps activate the yeast properly, ensuring your dough rises well. If the liquids are too hot, they can kill the yeast, so warm, not hot, is key.
What if I don’t have a thick pan to cook the bread?
While a thick pan, like cast iron, is ideal for even heat and good rising, you can still use a heavy nonstick pan. Just monitor the heat carefully to avoid burning and ensure the bread cooks through evenly.
Can I add herbs or spices to the dough?
Definitely! Adding things like chopped fresh herbs, garlic powder, or nigella seeds can give your Bazlama a unique flavor boost, making the bread even more special.
Is this bread suitable for freezing and thawing?
Yes, Bazlama freezes well. Just make sure it is thoroughly cooled before freezing, and thaw it at room temperature when needed. Reheat gently to restore that fresh-baked feel.
Final Thoughts
If you’re craving warm, homemade bread but don’t have an oven handy, this No-Oven Turkish Bread (Bazlama) with 3 Simple Ingredients Recipe is your perfect kitchen hack. It’s straightforward, quick, and incredibly rewarding to master. Once you try it, I promise this soft, pillowy flatbread will become a beloved staple you’ll want to make again and again. So grab those simple ingredients, fire up your stovetop, and let the delicious aromas fill your home!
Print with 3 Simple Ingredients Recipe 7")
No-Oven Turkish Bread (Bazlama) with 3 Simple Ingredients Recipe
- Prep Time: 15 minutes
- Cook Time: 30 minutes
- Total Time: 1 hour 45 minutes
- Yield: 6 pieces 1x
- Category: Bread
- Method: Stovetop
- Cuisine: Turkish
Description
This traditional Turkish Bazlama is a soft, fluffy flatbread made with just three main ingredients and cooked on a stovetop, requiring no oven. Perfect for serving alongside dips, soups, or as a sandwich base, this recipe yields a delicious homemade bread with a tender crumb and subtle buttery flavor.
Ingredients
Dough Ingredients
- 500 g Bread flour or all-purpose flour (4 cups)
- 160 ml Warm milk (2/3 cup)
- 160 ml Warm water (2/3 cup)
- 10 g Instant dry yeast (1.5 tbsp)
- 10 g Sugar (1 tbsp)
- 8 g Salt (0.8 tbsp)
For Cooking and Serving
- 20 g Melted unsalted butter or olive oil
- Chopped parsley (optional, for garnish)
Instructions
- Activate Yeast: Pour the warm milk, warm water, sugar, and instant dry yeast into a container. Stir well to mix and let it sit for a few minutes until the yeast starts to foam, indicating it is active.
- Make Dough: Add the flour and salt to the yeast mixture. Mix thoroughly, then knead the dough by hand until it becomes smooth and is no longer sticky. This usually takes about 8-10 minutes.
- First Proof: Cover the dough with a clean towel or plastic wrap and let it proof in a warm place until it doubles in size, which will take approximately 1 hour.
- Portion Dough: Once risen, divide the dough into 6 equal pieces. Shape each piece into a round ball and cover them with a plastic bag to prevent drying out.
- Shape Bread: Roll each dough ball on a floured surface into a round flatbread about 18 cm (7 inches) in diameter and 5 mm thick.
- Heat Pan: Heat a thick-bottomed pan or skillet over medium heat on the stove. A thicker pan is preferred to help the bread rise properly.
- Cook One Side: Place one flattened dough round into the heated pan. Cook until bubbles form on the surface, indicating the bread is cooking through, then flip it carefully.
- Cook Other Side & Adjust Heat: Cook the other side until it puffs up and sounds hollow like a balloon. Once puffed, reduce the heat to low to allow the inside to cook without burning the exterior.
- Cover Bread: Cover the bread with a cloth while cooking to keep the surface moist and prevent drying out.
- Finish and Serve: Once cooked through, brush the bread lightly with melted butter or olive oil. Garnish with chopped parsley if desired. Serve warm and enjoy.
Notes
- Use a thick pan or skillet for better heat retention and to help the bread puff up.
- Make sure the milk and water mixture is warm, not hot, to properly activate the yeast.
- If the bread is not puffing, try reducing the thickness of the dough slightly or adjusting the heat.
- You can customize by adding herbs like parsley or za’atar into the dough for extra flavor.
- Store leftovers wrapped in a cloth or plastic and reheat on a pan to keep the texture soft.
Your email address will not be published. Required fields are marked *