Description
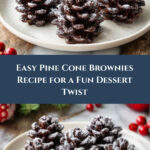
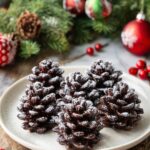
These Viral Pine Cone Brownies combine gluten-free, grain-free brownie bites shaped like pine cones, adorned with almond slices that mimic pine cone scales. The brownies are coated with rich melted chocolate and dusted with powdered sugar for a festive, frosted look. Perfect for holiday gatherings or a fun dessert treat, these brownies offer a gooey, chocolatey center with a crunchy texture from sliced almonds or cereal flakes.
Ingredients
Scale
Brownie Base
- 1 box gluten-free/grain-free brownie mix (such as Simple Mills) and ingredients required by the mix
- 1 cup sliced almonds (or substitute cereal flakes)
Chocolate Coating
- 9 oz chocolate chips
- 1 tsp coconut oil
Garnish
- Powdered sugar or powdered monk fruit
Instructions
- Prepare Brownie Mix: Follow the instructions on your gluten-free/grain-free brownie mix package carefully to prepare the batter. Bake the brownies ensuring not to overbake, so they remain somewhat gooey and easy to work with in the center.
- Cool Slightly: Let the baked brownies cool down for about 10 minutes. They should be cool enough to handle but still soft and pliable.
- Shape Pine Cones: Using your hands, carefully shape the brownie mixture into approximately 12 cone shapes, mimicking the form of cake pops.
- Apply Almond Scales: Gently press the sliced almonds (or cereal flakes) into and around the cones to create the appearance of pine cone scales. Handle carefully as the shapes are fragile.
- Freeze Pine Cones: Place the shaped and decorated pine cones on a parchment paper-lined sheet pan. Freeze them for 30 minutes to firm up before coating.
- Melt Chocolate Coating: In a microwave-safe bowl, melt the chocolate chips together with the coconut oil in 30-second increments, stirring between each until smooth. Alternatively, melt using a double boiler.
- Coat Pine Cones: Remove the pine cones from the freezer and carefully dip or spoon the melted chocolate over each cone, fully coating them. Return the chocolate-coated pine cones to the parchment paper to let the chocolate set.
- Garnish and Serve: Once set, sprinkle powdered sugar or powdered monk fruit over the top to create a frosted effect. Serve and enjoy!
Notes
- Every brownie mix behaves differently. The results may vary depending on the mix brand and ingredients.
- If your melted chocolate is too thick for coating, add more coconut oil gradually to thin it out.
- Semi-sweet or dark chocolate work better for coating than milk chocolate.
- If the brownie mixture is crumbly, adding some chocolate or cream cheese frosting can help bind it together for shaping.