

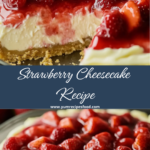
This Strawberry Cheesecake is the ultimate dessert indulgence, featuring a buttery graham cracker crust, rich and creamy cheesecake filling, and a vibrant strawberry glaze topping. While it may look and taste like a professional bakery creation, it’s surprisingly manageable to make at home with a bit of preparation and patience.
Why You’ll Love This Recipe
-
Classic, crowd-pleasing dessert for any occasion
-
Silky, dense, and creamy texture
-
Homemade strawberry glaze adds natural sweetness and color
-
Perfect balance of tangy cream cheese and sweet fruit
-
Customizable with seasonal fruits or chocolate drizzle
-
Baked using a water bath for a smooth, crack-free finish
-
Ideal for celebrations, holidays, or special dinners
-
Can be made ahead and chilled overnight
-
Impressive yet simple enough for home bakers
-
Leftovers store beautifully and taste even better the next day
Ingredients
(Tip: You can find the complete list of ingredients and their measurements in the recipe card below.)
For the Crust:
-
Graham cracker crumbs
-
Sugar
-
Butter
For the Cheesecake Filling:
-
Full-fat cream cheese (softened)
-
Sugar
-
Cornstarch
-
Eggs
-
Sour cream
-
Heavy cream
-
Vanilla extract or vanilla paste
For the Strawberry Glaze:
-
Sugar
-
Cornstarch
-
Lemon juice
-
Fresh strawberries
Directions
-
Preparation:
-
Remove cold ingredients from the refrigerator and let them soften.
-
Preheat oven to 350°F (175°C). Prepare your springform pan (see instructions below for water bath setup).
-
-
Make the Crust:
-
In a bowl, mix graham cracker crumbs, sugar, and melted butter until the texture resembles wet sand.
-
Press the mixture evenly into the bottom of the springform pan.
-
Bake for 10 minutes. Remove from the oven and increase oven temperature to 400°F (200°C).
-
-
Prepare the Filling:
-
Beat the cream cheese until smooth, then add sugar and cornstarch.
-
Add eggs one at a time, beating gently after each.
-
Mix in sour cream, heavy cream, and vanilla until fully combined and smooth.
-
Pour the filling over the pre-baked crust.
-
-
Bake the Cheesecake:
-
Wrap the springform pan with foil (see below), then place into a larger pan.
-
Pour hot water into the outer pan to create a water bath.
-
Bake at 400°F for 10 minutes, then reduce heat to 230°F (110°C) and bake for 1 hour.
-
-
Cool and Chill:
-
Turn off the oven and leave the door slightly open. Let the cheesecake cool in the oven for 1 hour.
-
Remove and cool completely on the counter.
-
Cover loosely and refrigerate for at least 8 hours or overnight.
-
-
Prepare the Strawberry Glaze:
-
In a saucepan, combine sugar, cornstarch, and lemon juice. Cook until sugar dissolves and mixture thickens.
-
Stir in sliced strawberries and cook briefly. Let cool for 10 minutes, then chill completely.
-
-
Assemble and Serve:
-
Release the cheesecake from the pan.
-
Stir the strawberry glaze and spoon it evenly over the top of the cheesecake.
-
Slice and serve chilled.
-
Servings and timing
-
Servings: 10–12
-
Prep Time: 30 minutes
-
Cook Time: 1 hour 10 minutes
-
Cooling Time: 1 hour
-
Chilling Time: 8 hours or overnight
-
Total Time: About 10 hours (including chill time)
Variations
-
Berry Medley: Use a mix of blueberries, raspberries, and blackberries in place of strawberries.
-
Chocolate Crust: Use crushed chocolate cookies or Oreos instead of graham crackers.
-
Citrus Zest: Add lemon or orange zest to the filling for extra brightness.
-
Swirled Cheesecake: Swirl strawberry puree into the batter before baking for a marbled effect.
-
Mini Cheesecakes: Bake in muffin tins for individual portions.
-
No-Bake Option: Use a gelatin-set filling and skip the baking process for a summer-friendly version.
-
Nutty Crust: Mix finely chopped nuts into the crust for added texture.
-
Alcohol Infusion: Add a splash of Grand Marnier or Amaretto to the glaze for a subtle twist.
-
Vegan Adaptation: Use plant-based cream cheese, coconut cream, and agar instead of eggs.
-
Low-Sugar Option: Use a sugar substitute like erythritol or stevia.
Storage/Reheating
-
Storage: Store the cheesecake in the refrigerator, covered, for up to 5 days.
-
Freezing: Freeze slices (without glaze) for up to 2 months. Wrap individually in plastic and foil. Thaw in the refrigerator overnight.
-
Serving Tip: For clean slices, dip a sharp knife in hot water and wipe clean between cuts.
-
Avoid Reheating: Cheesecake is best served chilled and does not require reheating.
FAQs
Can I use frozen strawberries for the glaze?
Yes, but thaw and drain them first. Fresh strawberries provide the best texture.
How do I prevent the cheesecake from cracking?
Use a water bath, avoid over-mixing, and cool slowly in the oven with the door cracked.
Why is my cheesecake lumpy?
Ensure all dairy ingredients are fully softened before mixing for a smooth texture.
Can I use low-fat cream cheese?
Full-fat cream cheese is strongly recommended for the best texture and flavor.
What’s the purpose of cornstarch in the filling?
It helps stabilize the batter and creates a firmer, creamier cheesecake.
How do I know the cheesecake is done?
It should be set around the edges but slightly wobbly in the center when gently shaken.
Can I make the cheesecake without a springform pan?
A springform is ideal. If using a standard pan, line it well with parchment and note that removal will be more difficult.
Do I have to use a water bath?
While not mandatory, a water bath helps prevent cracks and ensures even baking.
Can I add the glaze before chilling?
It’s best to let the cheesecake chill first, then add the glaze so it stays vibrant and fresh.
What can I serve with this cheesecake?
Fresh berries, whipped cream, or mint leaves all make excellent garnishes.
Conclusion
Strawberry Cheesecake is a timeless dessert that brings elegance and indulgence to any table. With its velvety texture, buttery crust, and luscious fruit topping, it’s a favorite for birthdays, holidays, and celebrations alike. Follow this guide for a foolproof bake and enjoy the perfect slice of sweet, creamy satisfaction.
Print
Strawberry Cheesecake Recipe
- Prep Time: 5 minutes
- Cook Time: 0 minutes
- Total Time: 5 minutes
- Yield: Serves 2
- Category: Dessert, Drink
- Method: Blended
- Cuisine: American
- Diet: Vegetarian
Description
This Oreo Milkshake is creamy, rich, and loaded with the iconic chocolate-cookie crunch of everyone’s favorite treat. Made with just a handful of ingredients, it’s a quick and irresistible dessert perfect for satisfying sweet cravings in minutes!
Ingredients
-
8 Oreo cookies
-
2 cups vanilla ice cream
-
1 cup whole milk (adjust to desired thickness)
-
1/2 tsp vanilla extract (optional)
-
Whipped cream, for topping
-
Chocolate syrup, for drizzle
-
Extra Oreo cookies, for garnish (optional)
Instructions
-
Crush the Cookies:
Place Oreos in a freezer bag and gently crush with a rolling pin until fine crumbs form. -
Blend the Milkshake:
Pour milk into a blender, add vanilla ice cream and crushed Oreos. Pulse a few times, then blend until smooth and creamy. Stir in vanilla extract if using. -
Adjust Consistency:
Add more milk for a thinner shake or more ice cream for a thicker texture. -
Serve:
Pour into two glasses. Top with whipped cream, drizzle with chocolate syrup, and garnish with an extra Oreo cookie if desired. -
Enjoy:
Serve immediately with a straw and spoon for the ultimate indulgence.
Notes
-
Use dairy-free ice cream and milk for a vegan version.
-
Add a scoop of peanut butter or a drizzle of caramel for a fun twist.
-
For an ultra-chocolaty shake, use chocolate ice cream instead of vanilla.
Your email address will not be published. Required fields are marked *