Description
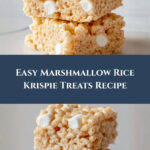
These classic Marshmallow Rice Krispie Treats are a quick and easy no-bake dessert, perfect for satisfying your sweet tooth with a delightful combination of crispy cereal and gooey marshmallows. Ready in just 15 minutes, they’re great for parties, snacks, or a fun treat anytime.
Ingredients
Scale
Ingredients
- 1/3 cup salted butter
- 2 (10.5 oz) bags mini marshmallows, divided
- 1 teaspoon vanilla extract
- 8 cups Rice Krispie cereal
Instructions
- Prepare the Pan: Spray a 9×13-inch pan with non-stick cooking spray to ensure the treats don’t stick and are easy to remove once set.
- Measure Cereal: Pour 8 cups of Rice Krispie cereal into a large mixing bowl and set aside for later use.
- Melt Butter: In the microwave, melt 1/3 cup salted butter until fully liquid, being careful not to burn it.
- Add Marshmallows: Mix most of the mini marshmallows into the melted butter.
- Microwave Mixture: Microwave this butter and marshmallow mixture for about one minute, stirring halfway through to ensure the marshmallows melt evenly.
- Stir in Vanilla: Add 1 teaspoon of vanilla extract to the melted marshmallow mixture and stir until smooth and well combined.
- Combine with Cereal: Pour the melted marshmallow mixture over the Rice Krispie cereal in the large bowl and gently mix until the cereal is fully coated.
- Fold In Remaining Marshmallows: Gently fold in the remaining mini marshmallows to add extra gooey pockets throughout the treats.
- Press Into Pan: Using wet hands to prevent sticking, press the mixture gently but firmly into the prepared 9×13 pan to form an even layer.
Notes
- Using wet hands when pressing the treats prevents sticking and helps achieve a flat, even surface.
- For variation, consider adding chocolate chips, sprinkles, or nuts to the mixture before pressing into the pan.
- Store the treats in an airtight container at room temperature for up to 3 days for best freshness.
- To make cutting easier, let the treats cool completely in the pan before slicing.